Discover the store
After connecting PostGIS, choose Discover and publish layers in the workspace guide, or open Layers → Add layer.
- Select
sample-postgisand choose Discover layers. - Clear any unwanted selections and choose
public.places. - Set Public ID to
placesand Title toPlaces. - Choose Publish 1 layer.
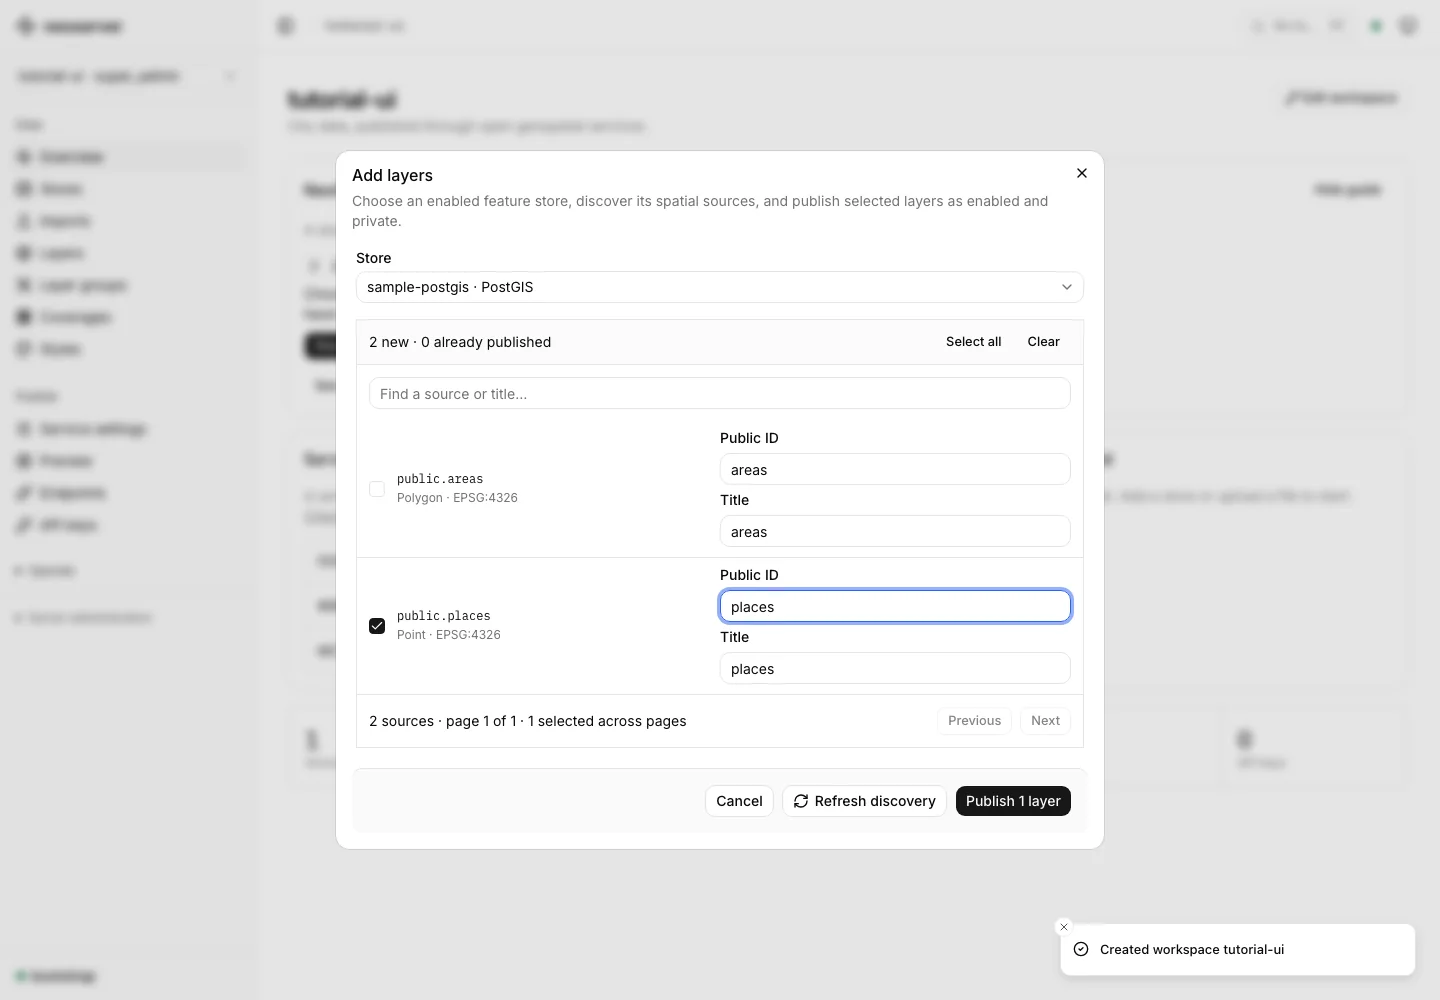
The completion dialog provides Preview, Connect a client, and Manage access actions. Choose Done to return to the catalog.
Confirm the publication
Open Layers. The places row confirms that the dataset reached the catalog. Restricted means it is private, not that publication failed.
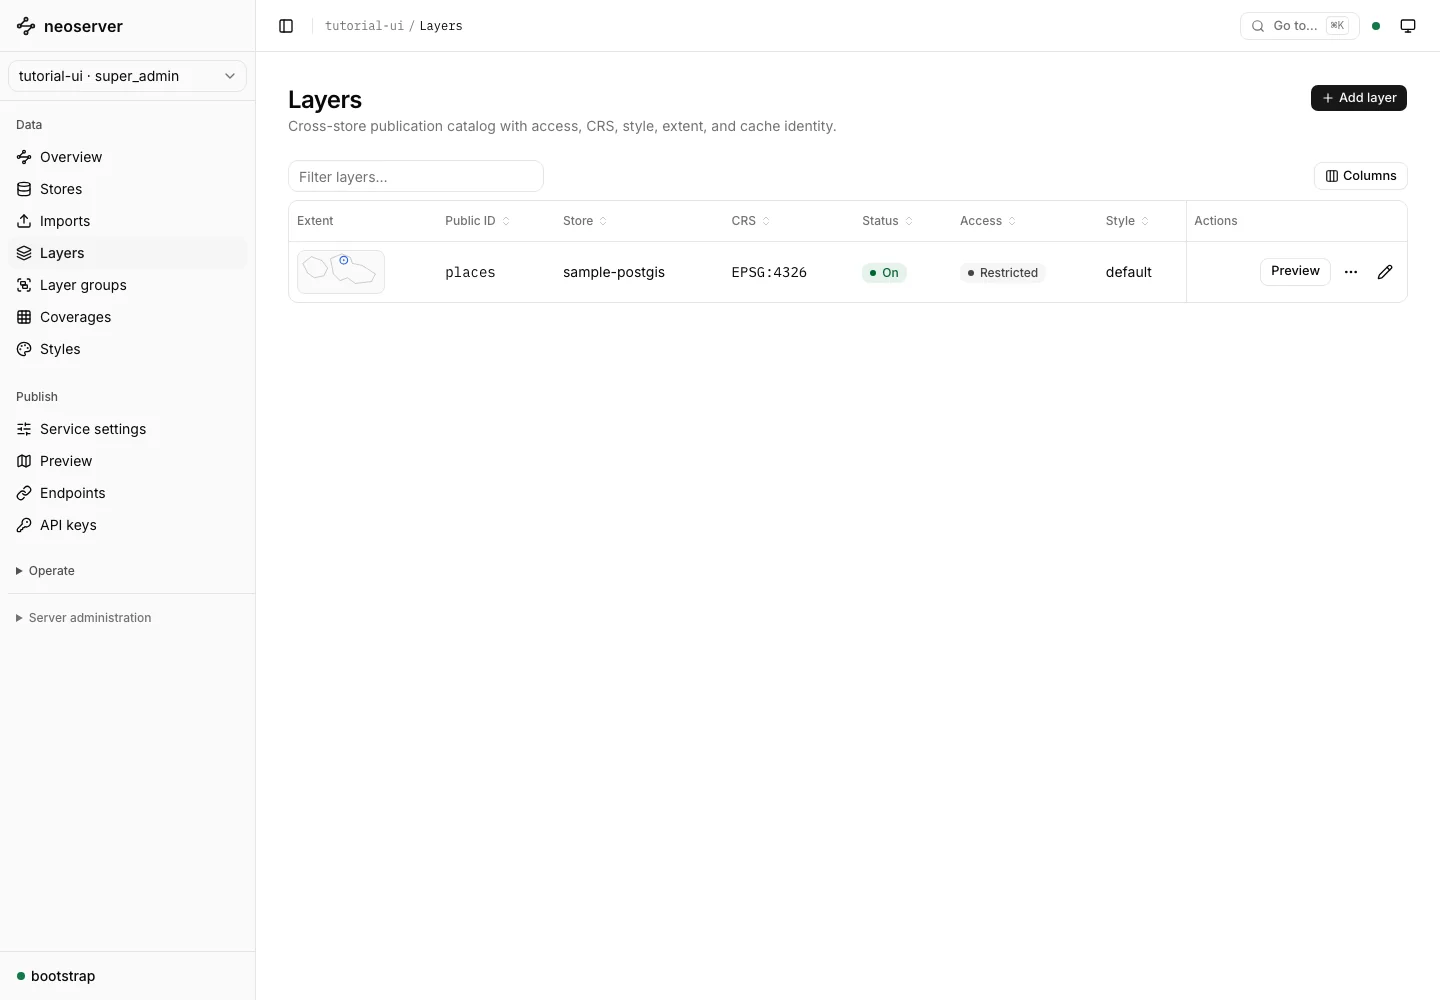
Choose Preview on the row. The default GeoJSON preview works with OGC API Features without requiring WMS. Use Fit if the features are outside the current view.
Edit or unpublish
Use the row’s actions menu to edit publication settings, connect a client, or unpublish. Expand Advanced publication settings for spatial, raster, style, or cache options. On narrower screens, the catalog presents cards and puts the same actions in a single menu.
Unpublishing removes the publication from the catalog; do not assume it deletes the original database table or file. Check dependent groups and other references before deletion.
Continue with styles and map preview or client connections.